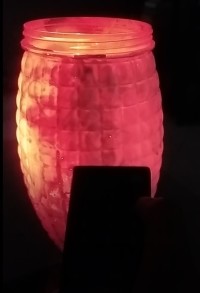
Remote controlled RGB Lamp

Hi friends, after making the remote-controlled Lamp, I wanted to make the project a bit advanced and more beautiful.
After making the remote-controlled Lamp, I wanted to make the project a bit advanced and more beautiful. So, this time I made a Remote controlled RGB lamp. The parts list is quite similar to the previous project. This time I took an RGB common-cathode LED. I took a breadboard too.
The lamp can glow in 7 colours. Red, blue, green, cyan, white, purple and orange.
The container had to be of enough height to accommodate the breadboard inside. I managed to buy one and spray painted that with white colour.
Parts list:
Arduino Nano x 1
IR receiver 38Khz x 1
RGB LEDx 1
Breadboard x 1
330-ohm resistor x 1
9V battery with connector x 1
Jumper wires
An IR remote. I took my sony smart TV remote
A suitable container
Connection
| Arduino UNO | IR receiver module
| VCC | +
| GND | -
| 2 | Output
| Arduino UNO- R3 | RGB Led
| GND | -
| 9 | R
10 G
11 B
Code :
At first you have to download and install the irremote.h library from here. Then write and upload the following code to arduino. You may have to change the values of the cases depending on which remote you're using. For example, I used my Sony smart TV remote. If I press '1', it sends the value 16. For your remote, the value can be different.
#include
int RECV_PIN =2;
int bluePin = 11;
int greenPin = 10;
int redPin = 9;
IRrecv irrecv(RECV_PIN);
decode_results results;
void setup(){
 Serial.begin(9600);
 irrecv.enableIRIn();
 pinMode(redPin, OUTPUT);
 pinMode(greenPin, OUTPUT);
   pinMode(bluePin, OUTPUT);
}
void loop(){
   if (irrecv.decode(&results)){
int value = results.value;
Serial.println(value);
       switch(value){

         //set color red
         case 16: //Keypad button "1"
         delay(50);
         analogWrite(redPin, 0);
         analogWrite(greenPin,0);
         analogWrite(bluePin, 0);
         delay(50);
         analogWrite(redPin, 255);
         analogWrite(greenPin,0);
         analogWrite(bluePin, 0);


         }
       switch(value){

         //set color green
         case 2064: //Keypad button "2"
         delay(50);
         analogWrite(redPin, 0);
         analogWrite(greenPin,0);
         analogWrite(bluePin, 0);
         delay(50);
         analogWrite(redPin, 0);
         analogWrite(greenPin,255);
         analogWrite(bluePin, 0);

         }
         switch(value){

          //set color blue
         case 1040: //Keypad button "3"
         delay(50);
         analogWrite(redPin, 0);
         analogWrite(greenPin,0);
         analogWrite(bluePin, 0);
         delay(50);
         analogWrite(redPin, 0);
         analogWrite(greenPin,0);
         analogWrite(bluePin, 255);

         }
         switch(value){

         //set color cyan
         case 3088://Keypad button "4"
         delay(50);
         analogWrite(redPin, 0);
         analogWrite(greenPin,0);
         analogWrite(bluePin, 0);
         delay(50);

         analogWrite(redPin, 0);
         analogWrite(greenPin,255);
         analogWrite(bluePin,255);

        }

         switch(value){

         //set color white
         case 528://Keypad button "5"
         delay(50);
         analogWrite(redPin, 0);
         analogWrite(greenPin,0);
         analogWrite(bluePin, 0);
         delay(50);
         analogWrite(redPin, 255);
         analogWrite(greenPin,255);
         analogWrite(bluePin,255);

         }

    switch(value){

         //set color Yellow
         case 2576://Keypad button "6"
         delay(50);
         analogWrite(redPin, 0);
         analogWrite(greenPin,0);
         analogWrite(bluePin, 0);
         delay(50);
         analogWrite(redPin, 255);
         analogWrite(greenPin,255);
         analogWrite(bluePin,0);

         }
      switch(value){

         //set color purple
         case 1552://Keypad button "7"
         delay(50);
         analogWrite(redPin, 0);
         analogWrite(greenPin,0);
         analogWrite(bluePin, 0);
         delay(50);
         analogWrite(redPin, 255);
         analogWrite(greenPin,0);
         analogWrite(bluePin,255);

         }
        switch(value){

         //set color orange
         case 3600://Keypad button "8"
         delay(50);
         analogWrite(redPin, 0);
         analogWrite(greenPin,0);
         analogWrite(bluePin, 0);
         delay(50);
         analogWrite(redPin, 250);
         analogWrite(greenPin,50);
         analogWrite(bluePin,0);

         }


     switch(value){
        // case 25979: //Keypad button "off"
         //LED off
         case 2704:
         analogWrite(redPin, 0);
         analogWrite(greenPin,0);
         analogWrite(bluePin, 0);


         }


       irrecv.resume();
   }
} 


Diskussion (2 Kommentare)