Red Pitaya - PIR Motion Sensor
über

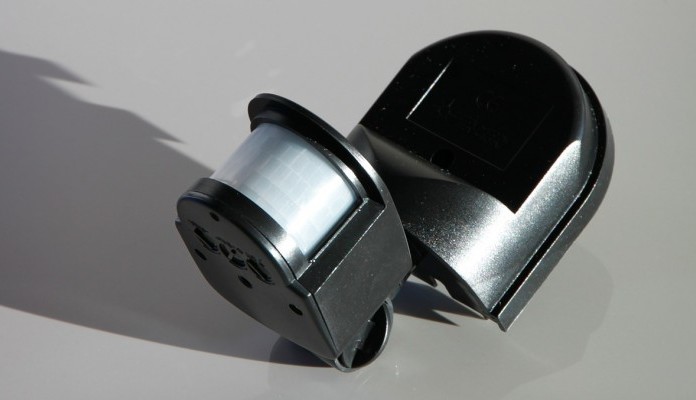
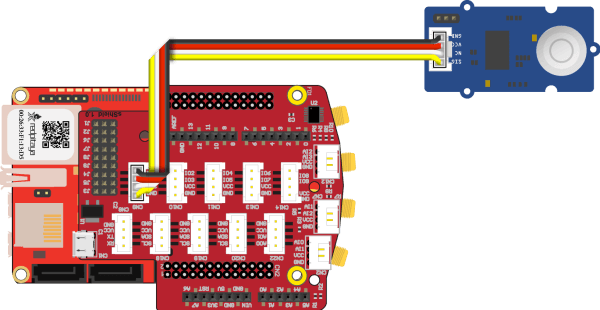
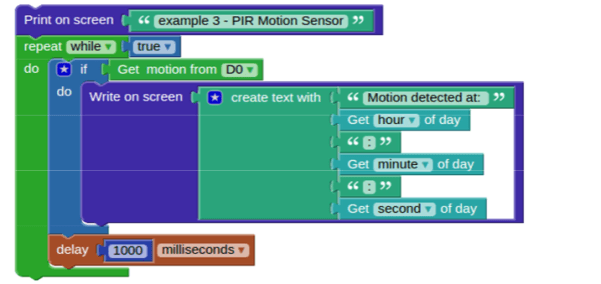
The previous examples only used indicators; the LED and buzzer. This example – as well as the extension board again – uses an infra red sensor to detect motion, so the program will know if something moves within the sensors vicinity. Every second the program will check for motion. If motion is detected, it will report it by printing a line containing the current time on the screen. Please use the wiring and block diagrams below for guidance:
Step 1
Connect the PIR Motion Sensor to the CN12 connector on the extension module.

Step 2
An infinite loop with a 1 second delay at the end is used again. Inside the loop there is a Program > Logic > if do block, which will execute on the condition that the Sensors > Motion sensor> get motion from will return true. This will happen each time somebody is moving in the vicinity of the sensor. The sensor can be attached to various connectors on the extension module, here the ‘D0’ option is used as specified in the sensor block. If the condition is true the Program > Screen and keyboard > Write on screen block will be executed. A text block must be placed inside, here the Program > Text > create text with is used to concatenate several short text strings into one longer. The first string “Motion detected at: ” is never changing so it is placed inside the Program > Text > ” ” block. We also wish to print the actual time (hour:minute:second), blocks for this can be found inside Program >Date and Hour > get [] of day.

Step 3 - Experimentation
Experimentation:
Similar to indicators, sensors can also be attached to different shield connectors, here the ‘D0’ connector is used, you can try attaching to a different connector and changing the number. This will become handy, when a combination of multiple sensors indicators will be used and it will not be possible to attach them to the same connector. You should also try changing the printed text, for example adding the date.


Diskussion (0 Kommentare)